How can I repair a puncture in the radiant tubing?
How can I repair a puncture in the radiant tubing?
In the event of an accidental piping puncture, do not panic, the system is a closed loop so the amount of water that may leak is limited. That is assuming there is not an automatic refill valve with the security valve left open.
When installing new wall or ceiling fixtures, (such as decorations, lighting fixtures, blinds, frames, etc.) the usage of a thermal camera is recommended to reveal the piping hidden behind drywall.
An unknowing occupant may accidentally puncture a radiant tube within the Ray Magic® panel with a nail or a screw by installing new fixtures on the ceiling or walls.
The damaged section can be repaired using simple 8mm press fit couplings and, if required, 8mm PEX tubing.
Follow the instruction below:
Turn off the radiant system or the specific zone where the puncture occurred.
(This could also be done by manually turning off the manifold loop related to the particular zone)
Extract the nail or screw.
Ensure you turn off the zone valve before extracting the nail or screw.
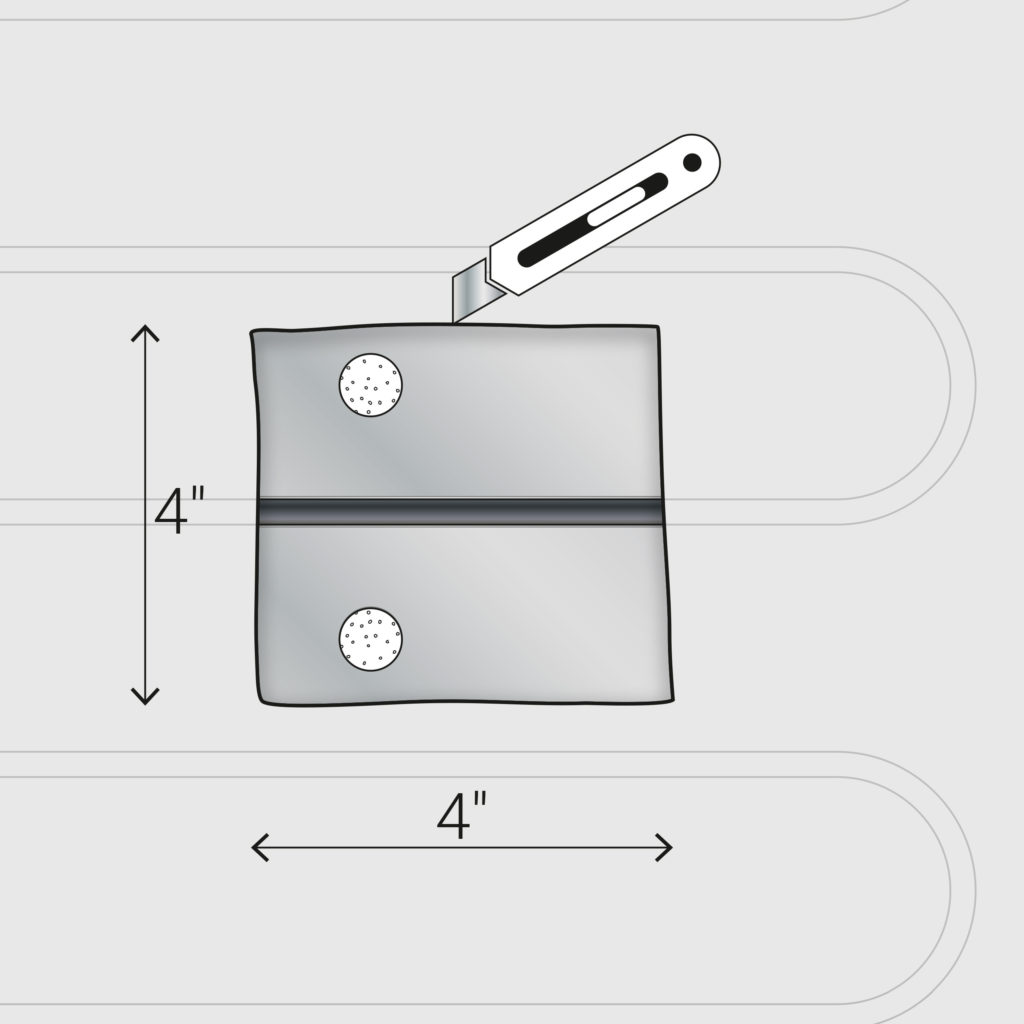
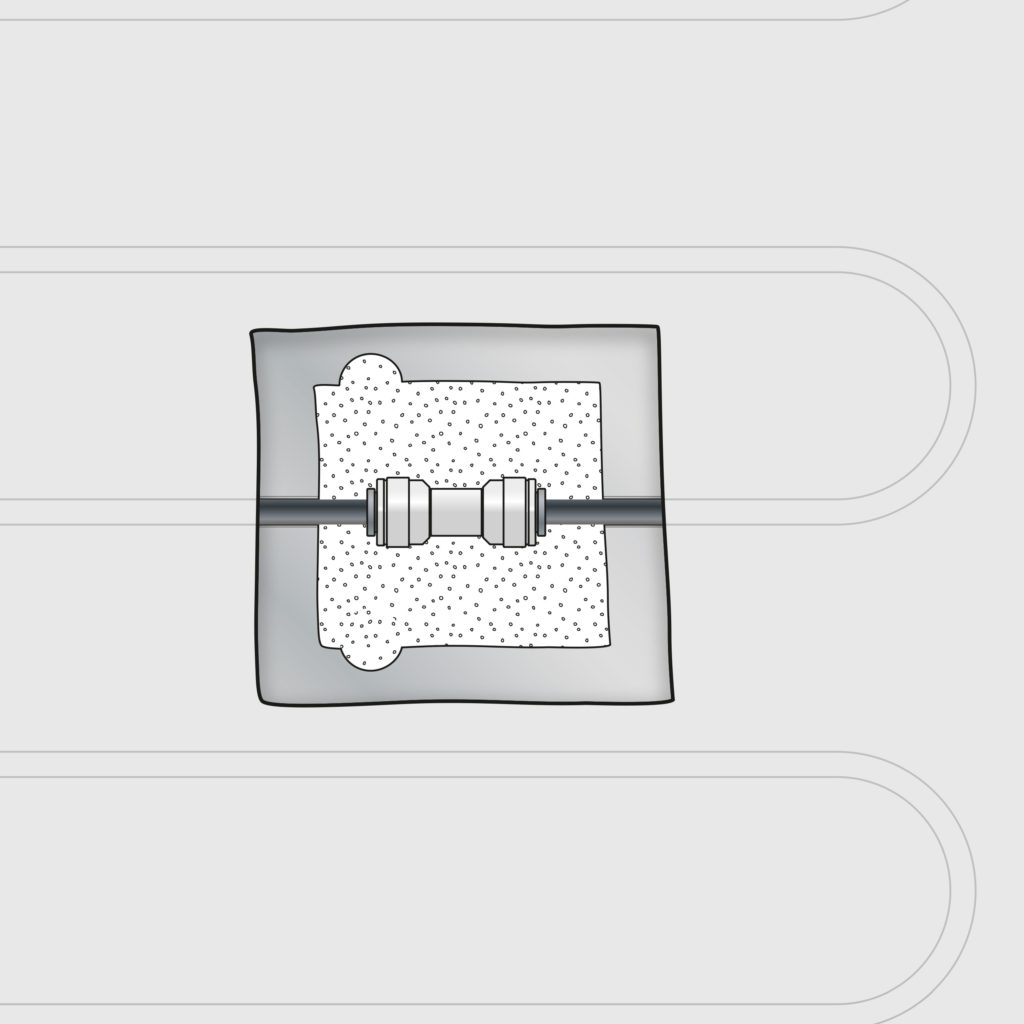
Cut a square opening and remove (about 4” x 4”) the drywall covering the area where the piping is punctured.
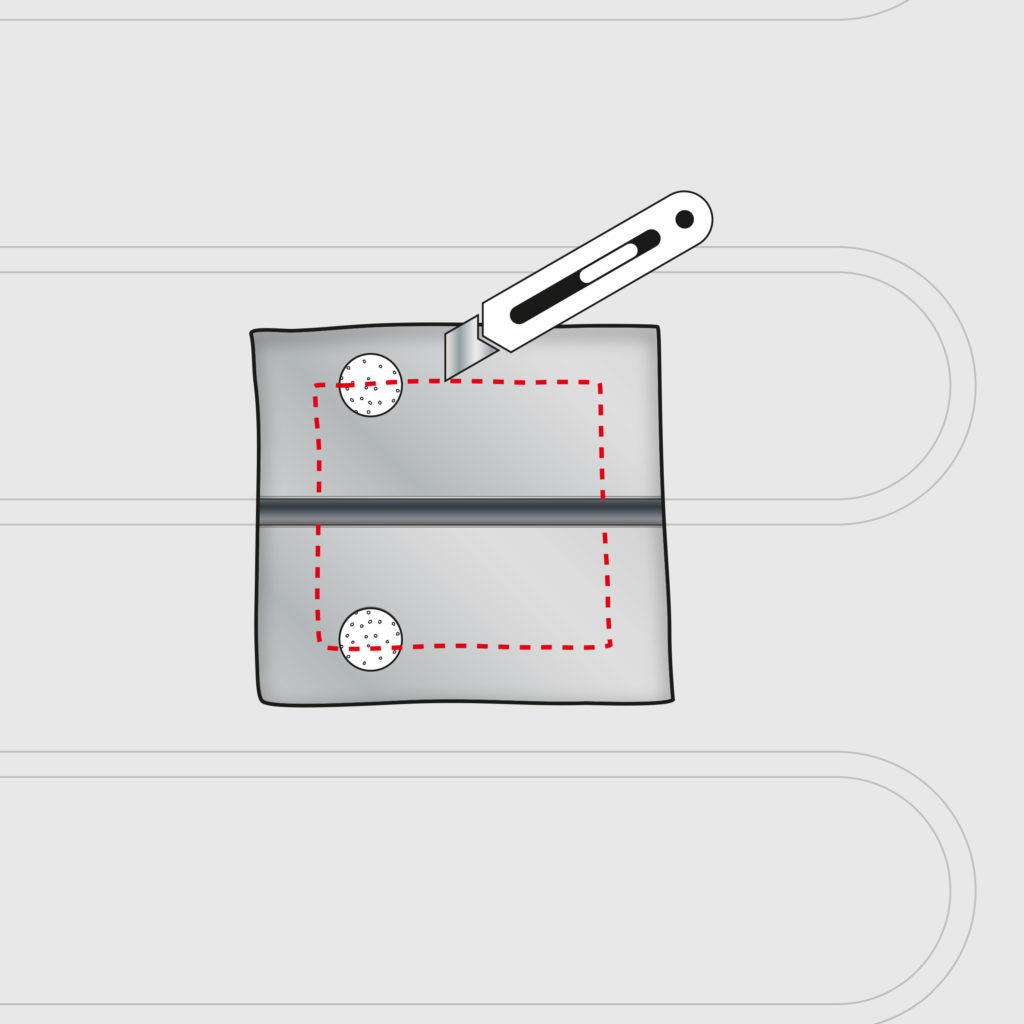
Using a pair of scissors, cut the aluminum heat transfer plate around the punctured pipe. Completely remove the aluminum plate around and below the pipe.
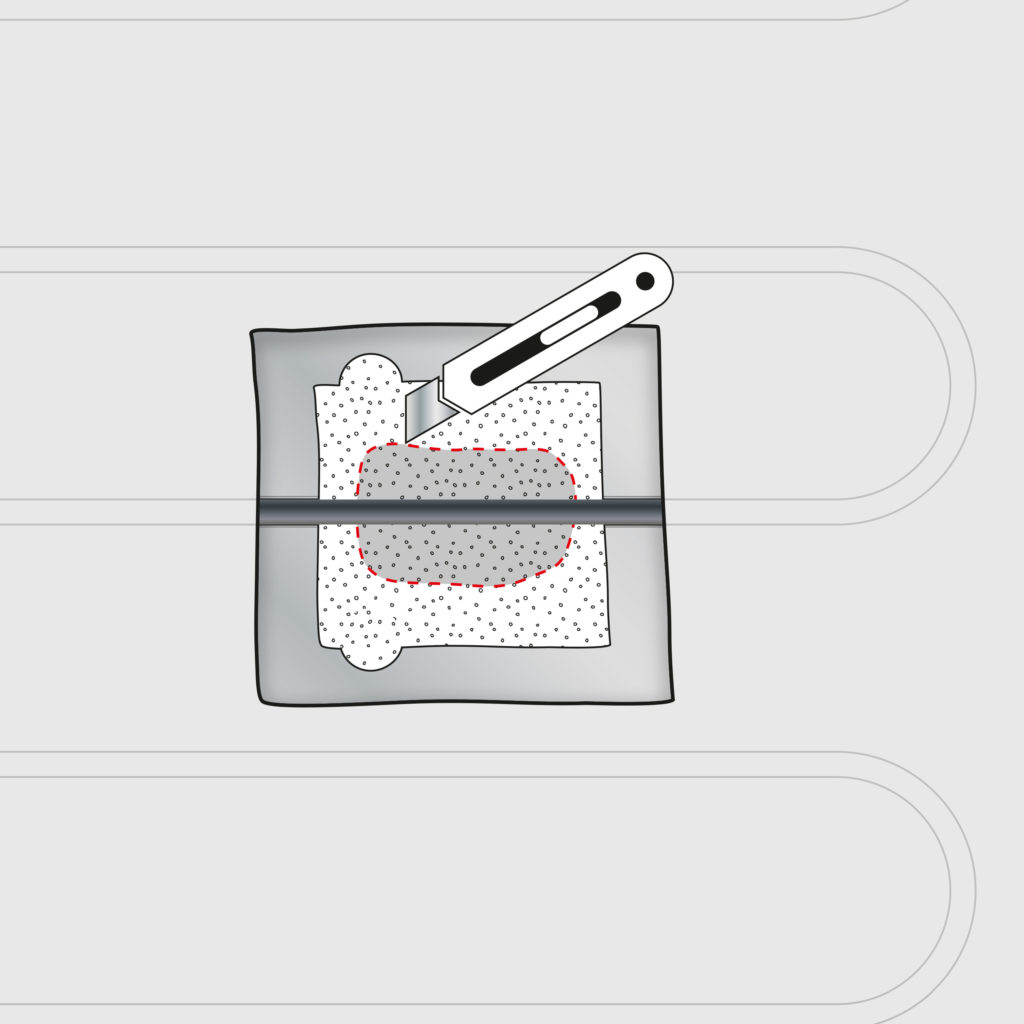
Remove the EPS below the pipe as shown.
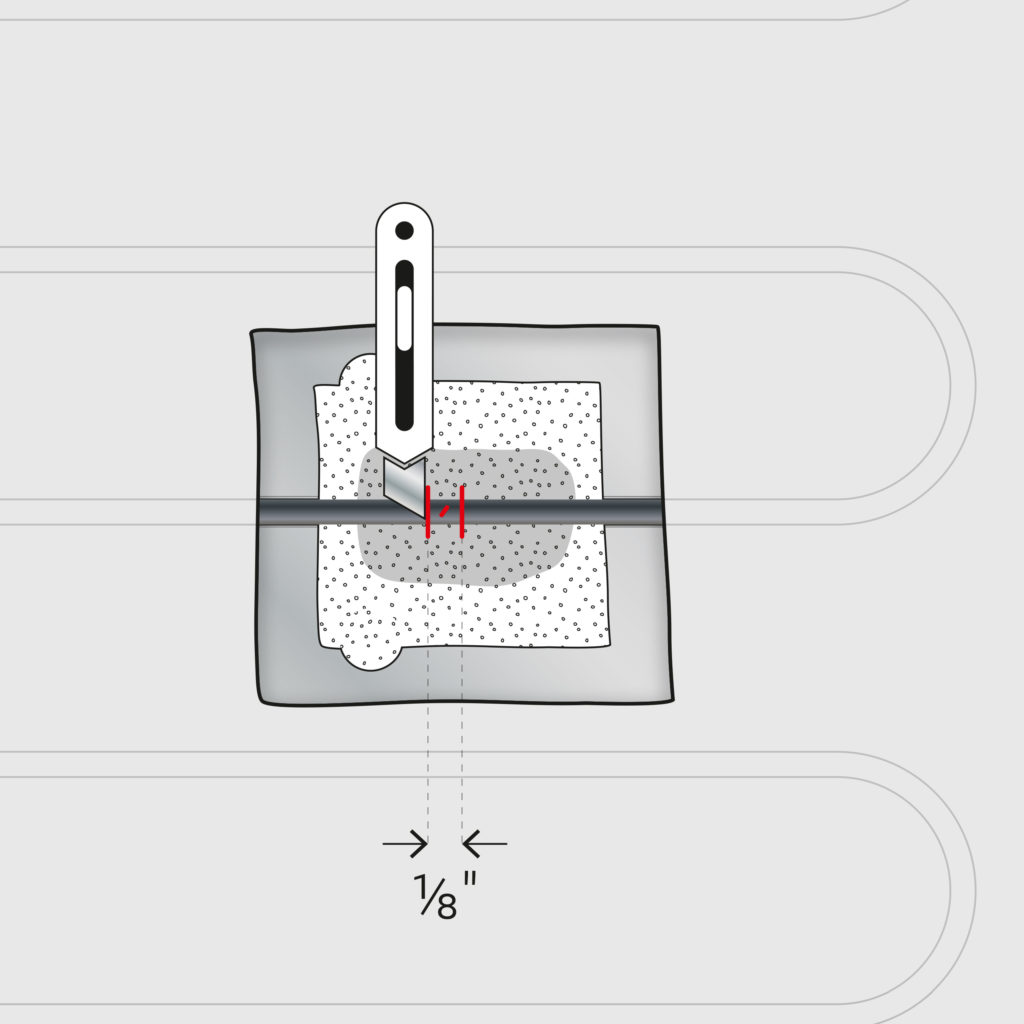
Using a cutter or knife, cut out the punctured portion of the pipe by cutting in two points with a distance of approximately ⅛″. Make sure the cuts are clean.
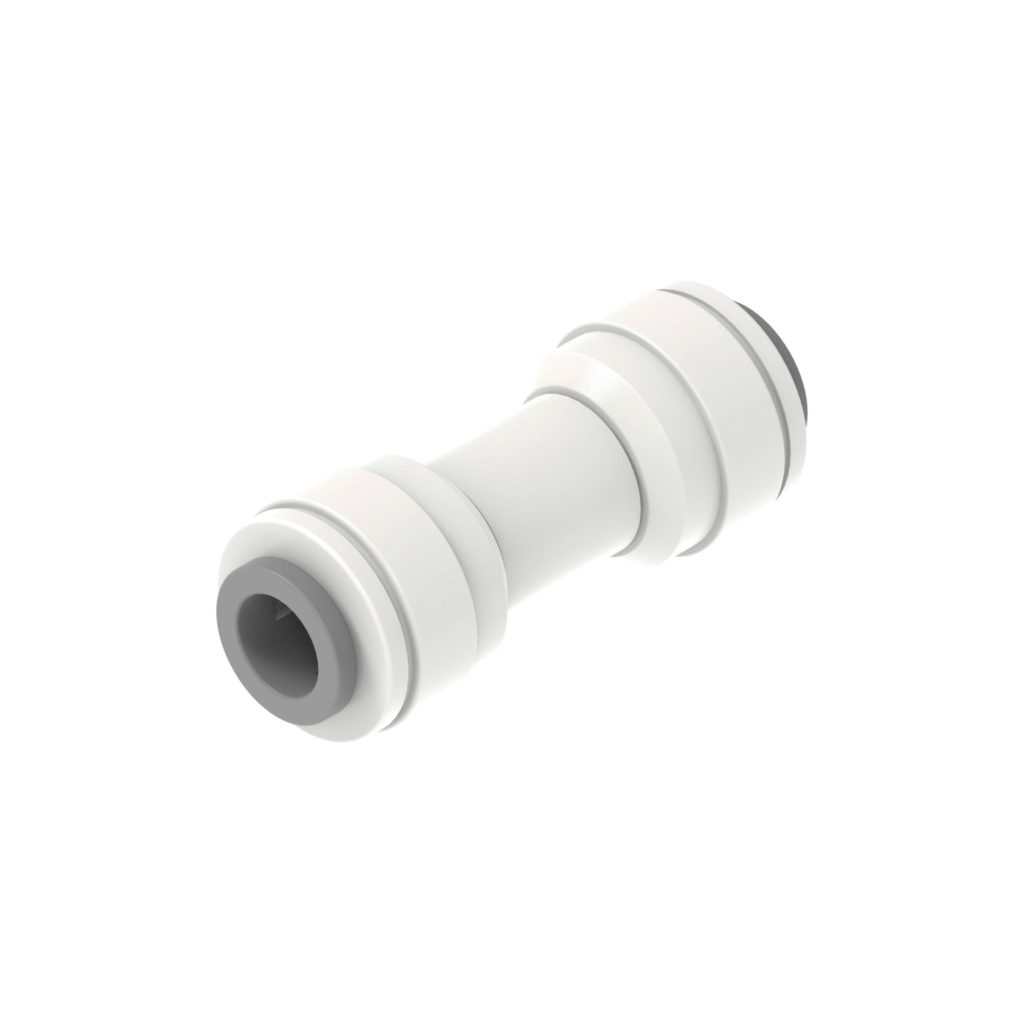
Procure a 8mm press-fit coupling. Messana recommends the John Guest Speedfit 5/16″ (8mm) straight connector (PM0408S).
Insert the 8mm pipe into the coupling all the way until it hits the bottom of the fitting. Try to pull out the pipe to make sure that it is properly seated on both sides.
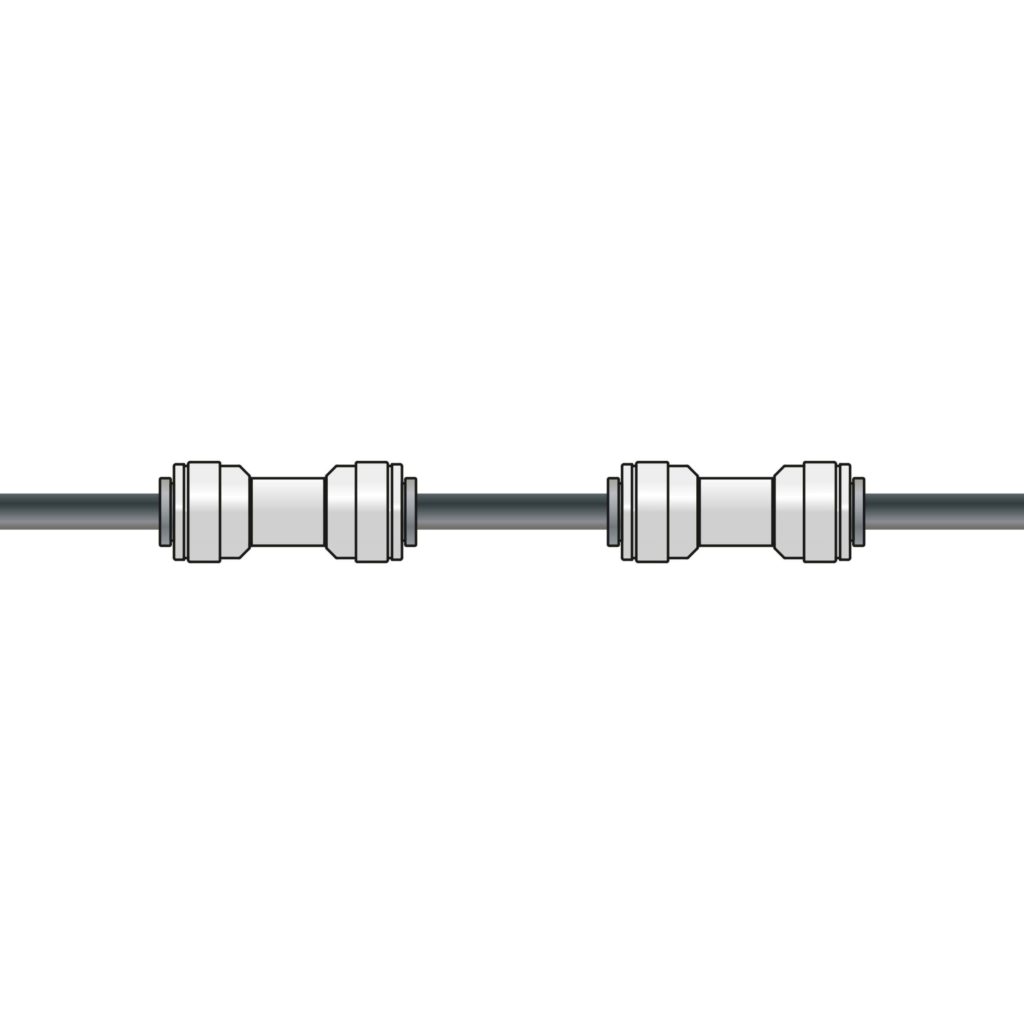
If the damaged segment of piping is more than ⅛″, perform a split by using a piece of the supplied 8mm pipe as shown.
Tape and mud the drywall. Let dry. Sand if needed. Repaint.
To provide the best experiences, we use technologies like cookies to store and/or access device information. Consenting to these technologies will allow us to process data such as browsing behavior or unique IDs on this site. Not consenting or withdrawing consent, may adversely affect certain features and functions.
Functional
Always active
The technical storage or access is strictly necessary for the legitimate purpose of enabling the use of a specific service explicitly requested by the subscriber or user, or for the sole purpose of carrying out the transmission of a communication over an electronic communications network.
Preferences
The technical storage or access is necessary for the legitimate purpose of storing preferences that are not requested by the subscriber or user.
Statistics
The technical storage or access that is used exclusively for statistical purposes.The technical storage or access that is used exclusively for anonymous statistical purposes. Without a subpoena, voluntary compliance on the part of your Internet Service Provider, or additional records from a third party, information stored or retrieved for this purpose alone cannot usually be used to identify you.
Marketing
The technical storage or access is required to create user profiles to send advertising, or to track the user on a website or across several websites for similar marketing purposes.